|
|
|
|
|
Major Problem Review
The object of this process is to review the resolution of a Problem in order to prevent recurrence and learn any lessons for the future. Furthermore it is to be verified whether the Problems marked as closed have actually been eliminated.
The following example demonstrates the application of the major Problem review in the context:
- When a Problem is detected, create a new Problem in a usual way.
- Click the 'Classify' button below to classify the Problem.
A Ticket Description dialog box asking you for an additional ticket description appears. You can see that the Statement Type is set to 'Information'. Fill in the Shorttext field at least and click 'OK' to proceed.
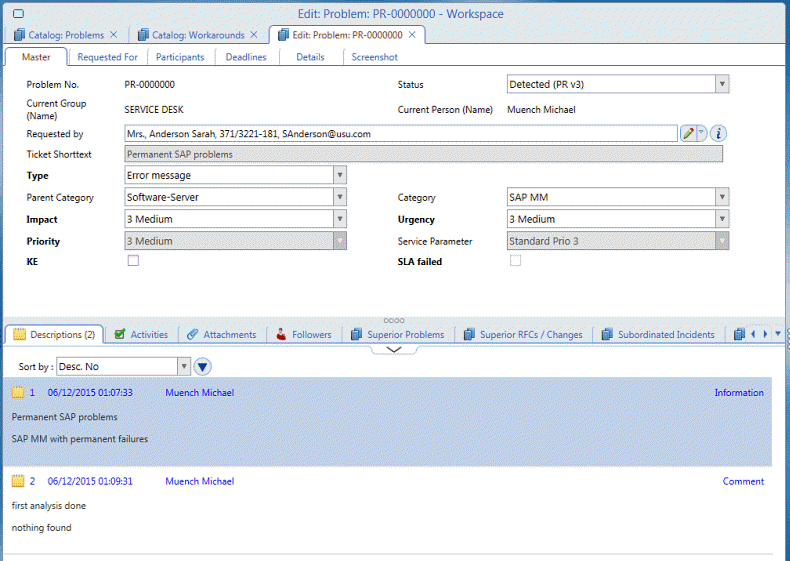
- You can see that the status has changed to 'Classified' in the Problem Editor.
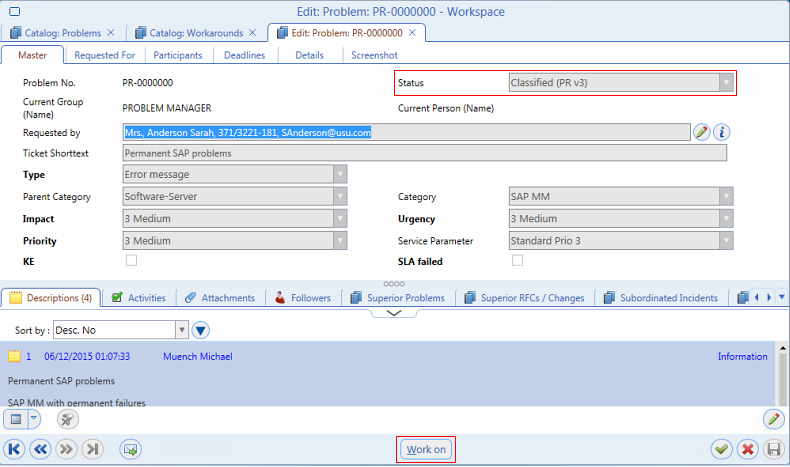
- Click the 'Work on' button to confirm that the Problem is being worked on.
Now you can either assign the Problem to another Support Group or mark the Problem as investigated (i.e. the diagnoses has been done).

- In this example, click 'Investigated' to proceed.
A new ticket description will be required. Note that the Statement Type has changed to 'Analyze'.
- Click 'OK' to proceed.
You can see that the status has changed to 'Investigated' in the Problem Editor. Below you can decide if you want to close the problem (if no solution found) or identify the solution.

- Click 'Solution Identified' because you have been able to identify the solution.
Again, a new ticket description will be required. Note that the Statement Type has changed to 'Proposal'.
- Click 'OK' to proceed.
You can see that the status has changed to 'Solution Identified' in the Problem Editor. Below you can decide if the solution failed or if the Problem can be considered resolved.

At this stage, you can also create and assign a Superior RFC/Change on the appropriate tab below if necessary.
- Click 'Resolved' to proceed.
A new ticket description will be required. Note that the Statement Type has changed to 'Solution'.
- Click 'OK' to proceed.
In the Problem Editor, click 'Work On'
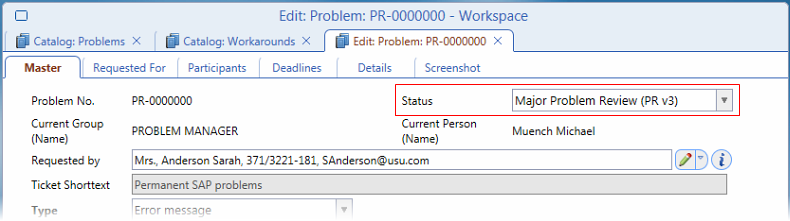
Now you can either Close the Problem or do the Major Problem Review.
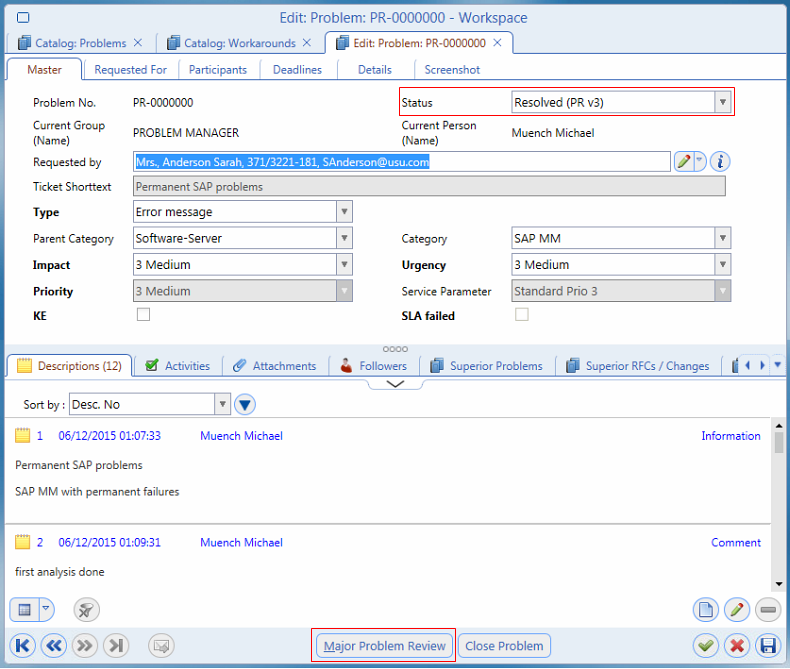
- Click the 'Major Problem Review',
A new ticket description will be required. Note that the Statement Type has changed to 'Comment'.
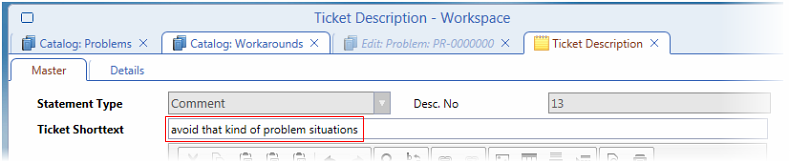
By filling in this ticket description, you are reviewing your experience with this Problem and assign it to the Problem.
- Click 'OK' to proceed.
In the Problem Editor, you can see that the status changed to 'Major Problem Review'.
- Close the Problem after the Major Problem Review using the 'Close Problem' button below.
Note that you had the possibility to close the Problem before if you didn't want to make the Major Problem Review.