|
|
|
|
|
Customizing with the Log Comment
In this topic you can follow a customization change being logged and the subsequent storage of the resulting XML file to the specified location.
The customization change being made in this example is a change of a simple translation:
- Create a new Log Comment and save it (see the 'Start New Logging' topic).
Every customization done from now on will be logged under this Log Comment.
- Change a translation in the Translation Editor and save it. In this example, a "Test" tooltip has been defined.
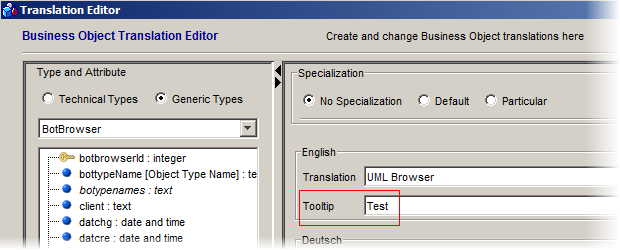
The change will be logged to the Log Comment.
- Now right-click the selected Log Comment at the bottom of the window and select 'Create Transfer' from the menu.
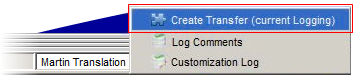
Note: There are also other options. The Create Transfer workflows in the sidebar can be used instead. The first one uses the currently active Log Comment. The second one is more powerful: It allows you to select one or more Log Comments from a the list of all Log Comments.
By selecting the 'Create Transfer' action, the Development Environment with the Master Environment will be compared and the process of creating a Customization Object for the current Log Comment will be started.
- The 'Exporter of Metamodel Changes' dialog box appears.
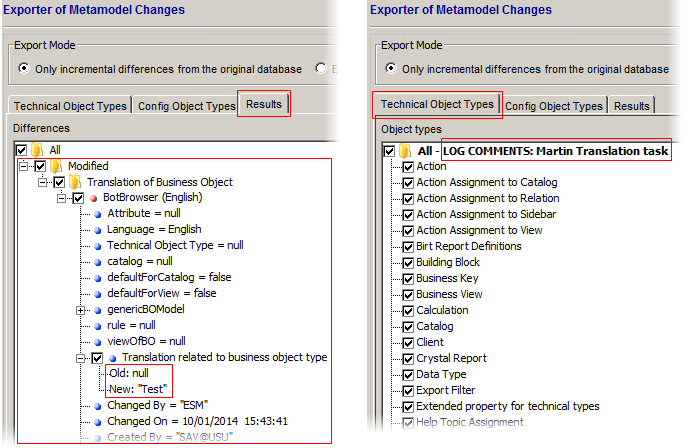
Here the result of the comparison between the Development Environment and the Master Environment will be displayed. Note that although there may be more customization changes made, only the one change (i.e. the change of a simple translation) is detected because only this change was made under the selected Log Comment. In this case, the Log Comment can be also viewed as a kind of filter.
There is a an XML file with the path and the generated name suggested at the bottom of the window:

The generated name contains the the time stamp prefix and the name of the Log Comment suffix.
- The XML file has to be stored physically now - it has to be exported. Click the 'Export' button to initiate the export of the XML file to the selected destination.
By completing the export of the XML file, the process of the customization under the selected Log Comment is finished for now. As a next step, the performed customization can be committed to the Master database. Note that customization change will be registered in the Customization Transfer Manager only if this "commit" (import) is carried out. After you execute the import, the Customization Transfer Manager will assume the control and it will arrange the transfers to other stages.
Please see the 'Registering a Customization Change in CTM' topic for details.