|
|
|
|
|
Registerring a Customization Change in CTM
After you make a customization change and compare your customization to the Master database, the physical XML file is available as a result of this comparison. The files have been created but they are not part of the Customization Transfer Manager yet: They need to be imported ("committed") to the Master stage first. Only after the import is executed, the CTM will assume the control and it is able to arrange the transfers to other stages.
The following example is a follow-up to the 'Customizing with the Log Comment' topic.
To commit (import) the customization to the Master database, proceed as follows:
- Click the 'Transfer' button in the 'Exporter of Metamodel Changes' dialog box.
The 'Importer' dialog box appears:
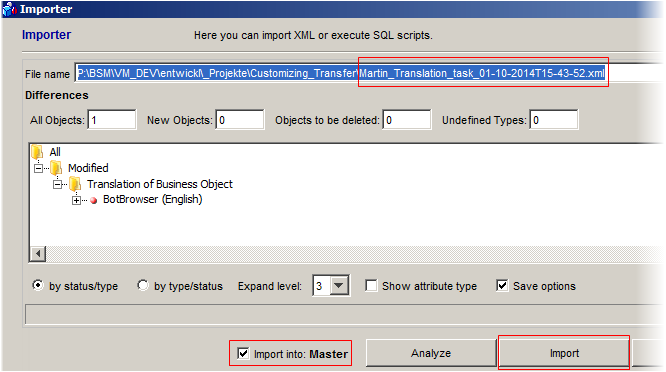
- Open the XML file which you want to import. In case you are importing a change you have just created, the path to the newly created XML file will be pre-filled and analyzed automatically.
Optional: Click the 'Analyze' button to analyze the XML file. If you expand the tree below now, you can see the specific change or changes which are to be imported.
- Select the 'Import into: Master' check box to set the Importer to import the customization into the Master Environment.
Note: The check box is selected by default.
- Execute the import by clicking the 'Import' button.
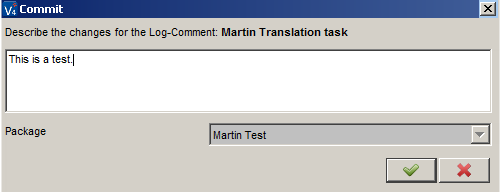
- A 'Commit' dialog box appears.
Here you can describe the change you made. Note that the Package name has to be selected, too.
Note: If there is only one open package, then it is assigned automatically.
- Click
 to add the comment and to assign the Package to the Customization Object.
The changes are saved to the Master database.
Verifying the Import
To verify if the import into the Master database has been successful, do the following:
- Click the 'Analyze' button again after the import.
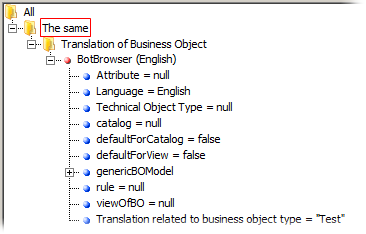
Now you can see if the environments are the same or not.
In our case, the changes have been committed successfully.