|
|
|
|
|
User Interface
The Workflow Creation Tool provides an easy to use graphical interface. The interface uses the mechanisms of common graphical sketching tool.
The WCT desktop comprises the following elements:
Main bar (1) |
Tool bar (2) |
Workspace (3) |
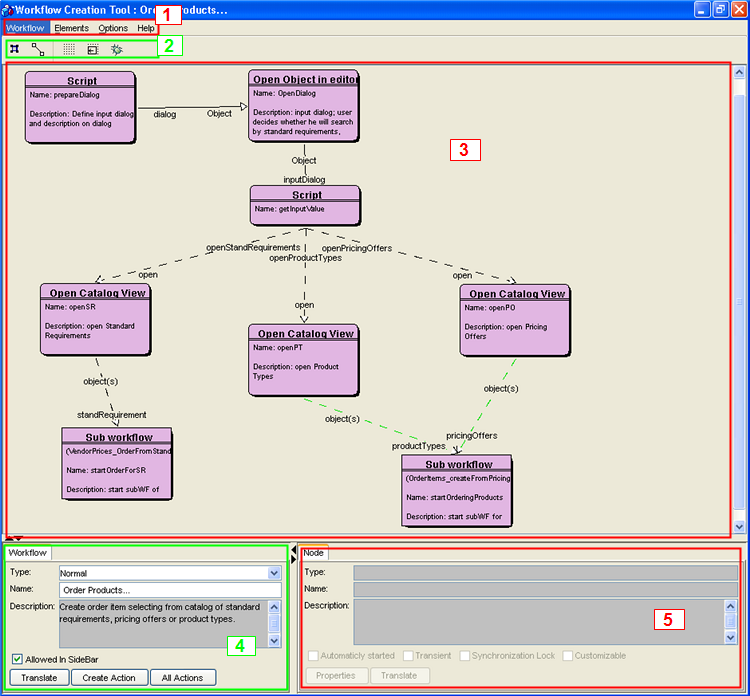
Workflow Creation Tool desktop
Window Component |
Function / Meaning |
Main bar (1) |
The Main bar contains general operations. For example, you can save the edited workflow or change settings of the Workflow Creation Tool. |
Tool bar (2) |
The toolbar provides a quick one-click access to some functions, most importantly Add node and Add transition buttons. You can drag and move the tool bar anywhere on the Workflow Creation Tool desktop. To fit the bar back to its original position, simply close the window. |
Workspace (3) |
In this part of the screen, you can design your workflow using the tools provided by the WCT on the Tool bar and Main bar. Note: To make more space for the workspace, disable the display of element properties and workflow properties. This can be done in the Options menu on the main bar. |
Here you can change the general properties of the workflow. |
|
In this part of the screen either Node properties or Transition properties are displayed (depending on the workflow element selected). |