|
|
|
|
|
Adding Transitions
To add a new transition, select Add transition (from the WCT's main bar or tool bar). Point the cursor to the source node and click the left mouse button, drag the cursor to the target node and click again.
With the Add Link Wizard
If the Add Link Wizard is active, the following screens appear.
The output parameters of the source node are listed.
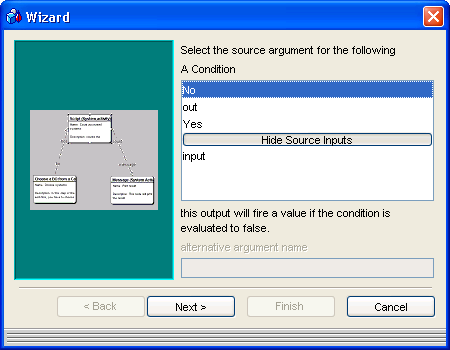
Select one of the output parameters of the source node
Select the parameter which is to be used on this transition to the target node.
Note: If several parameters should be passed from the source to the target node, then several transitions have to be created – one transition for each parameter to be passed.
Next, map that parameter to one of the available input parameters of the target node.
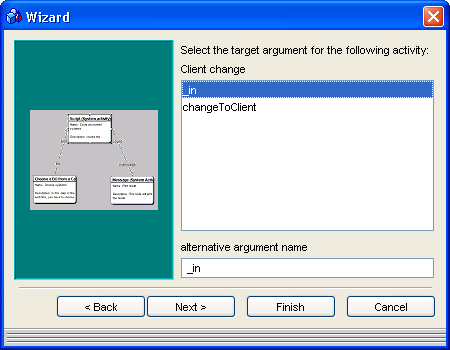
Select one of the input parameters of the target node
Next, you have to specify the transition type. This in turn dictates how or whether the target node fires. See the Transition Types topic for more information.
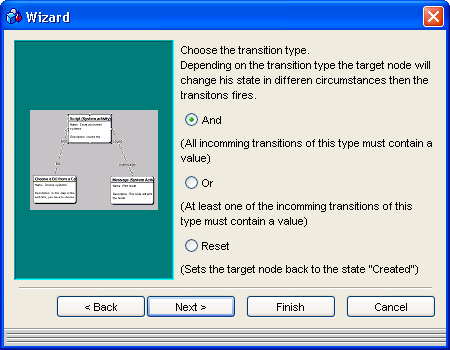
Choose the transition type
Finally, you have to specify whether the target node should use the same transaction as the source node. See the Transactions topic for more information.
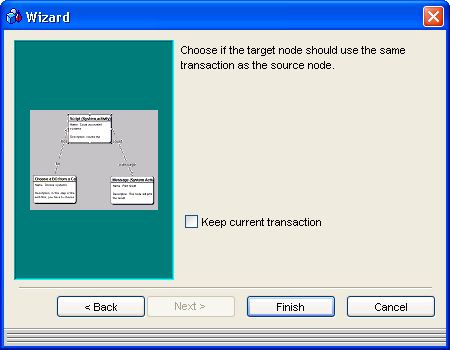
Keep Current Transaction
The Finish button ends the wizard and returns control to the WCT, with the new transition displayed.
Without the Add Link Wizard
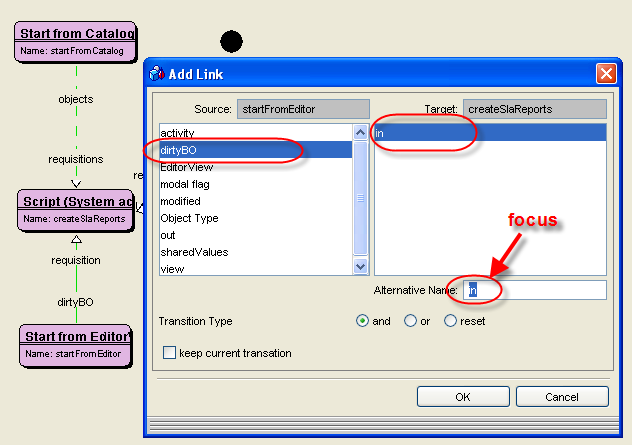
If the Add Link Wizard is not active, then the Add Link dialog is presented.
The main parameter of 'start' activities is preselected. If there is only one activity parameter (e.g. the Script activity has only 'in'), it is automatically preselected and the alternative name is preselected too and has focus so that the user can change the name easily.
Creating a transition without the wizard