|
|
|
|
|
Example of RM Project Creation
Using the sequence of steps detailed in the previous topics, the following resource project has been created:
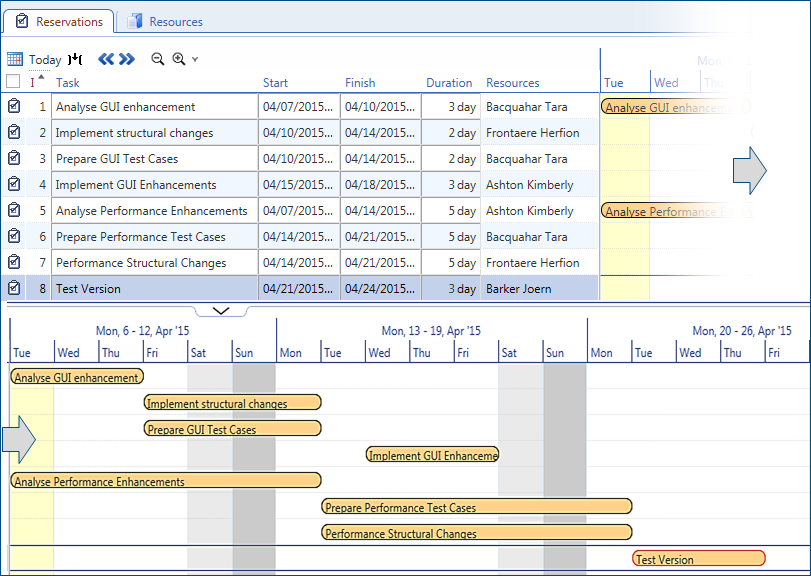
Example RM Project
These are the steps to create such RM project:
- Open the 'Resource Projects' catalog and call context menu action 'Create'.
- Catalog 'Catalogs For RM Project' opens. As the example RM project is an independent project (an RM project not based on any other object type), click 'Skip' to bypass object type creation.
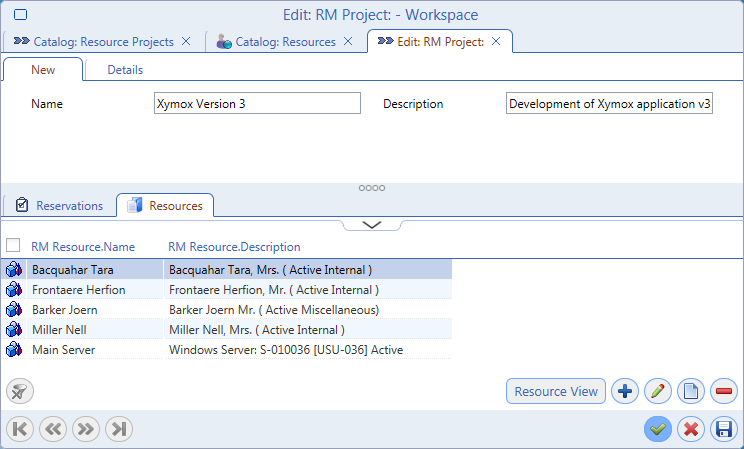
- An editor for creation of the new resource project opens. The project is given default automatic name - rename it as necessary and provide a description.

- For an independent project like this, the 'Details' tab links neither a ticket, not a process instance. It can, however, be used to link a business project to the RM project. Linking a business project can be used to expand the information available for the RM project.
In our example, let's suppose no suitable business project exists and we have to create it. Do this by clicking the 'Add new Project' button in the 'Project' reference view of the 'Details' tab. An editor for creation of a new business project opens. Use it to specify all relevant in formation and click 'Ok' to save the business project and close the editor.

- Back in the RM Project editor, go to the 'Resources' tab and assignresources to the resource project.
Call the 'Assign' action and select resources from the catalog of available RM Resources which opens. Click 'Ok'.
- Next comes the most important part of resource project creation - planning and reservation of resources. This is done in the 'Reservations' tab of the RM project editor.
The reference catalog in the tab can be displayed in three view modes: the table view, calendar view or timeline view. For creation of reservations, the timeline view is the most suitable. Use buttons in the bottom left-hand corner of the tab to switch to the timeline view.
Let's create the first reservation:
- Right-click in the 'Reservations' reference catalog and call action 'Create'.
- A new reservation gets created. It is given a default duration of 1 day encompassing the current date (from midnight to midnight). Edit the start, finish and duration values by inplace editing directly in the row.
To create the first reservation in the example RM project, '04/07/2015' has been entered as start value and '04/11/2015' as finish value. Duration was calculated by the application.
- Click in the 'Task' column of the row and use inplace editing to specify the name of the reservation.
The first task in the example project has been named 'Analyse GUI enhancement'.
- Right-click in the row and call action 'Add resources'. (If the RM project has not been saved since resources were assigned to it, click 'Apply' in the RM project editor before calling the 'Add resources' action.)
A catalog with resources assigned to the project opens in the timeline view (its default view mode). Select one or more resources to be assigned to the reservation and click 'Ok'. The timeline view of resources closes and the selected resource(s) is assigned to the reservation.
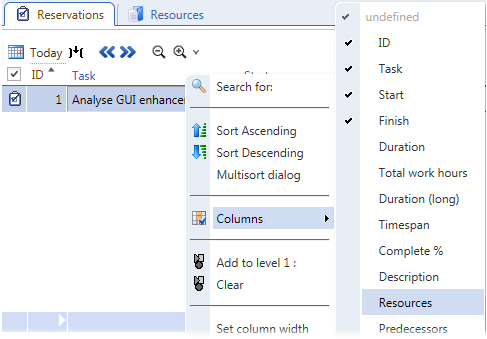
The first task in the example project has been assigned 'Tara Bacquahar' as its resource. To see the assigned resource, you may either double-click the reservation to open it for editing or you may add the 'Resource' column to the 'Reservations' timeline view. (Right-click in the catalog header and select 'Columns/Resources' from the context menu.)
- Let's create the next reservation 'Implement Structural Changes' as a subsequent reservation to the first one and assign multiple resources to it.
- Make sure that the first reservation 'Analyse GUI enhancement' is selected.
- Right-click and call the 'Create' action.
- A new reservation starting exactly when the previous one finished is created. Again, its default duration is one day.
- Using inplace editing in the row, name the reservation and specify its duration.
- Right-click the reservation and call action 'Add resources'. The catalog of available resources opens. This time let's assign two resources by multi-selecting in the catalog. As the catalogs is in the timeline view, we can easily see if the resources are not already booked for the time period of this second reservation.
- The third reservation, 'Prepare GUI Test Cases' will start at the same time as 'Implement Structural Changes'. Again, make sure that the first reservation 'Analyse GUI enhancement' is selected when the 'Create' action is called. Then follow the already described steps to specify the reservation.
- Use the same steps to create the remaining reservations in the RM project - as seen in the 'Example RM Project' screenshot at the top of this topic. Note that even though individual tasks in the project follow one another in a back-to-back fashion, they actually take into account the work shift times. For instance, task 'Implement Structural Changes' which starts on 04/10/2015 at 00:00:00 (right after 'Analyse GUI Enhancement') and finishes on 04/14/2015 at 00:00:00, actually represents two eight-hour shifts (depending on shift definitions).
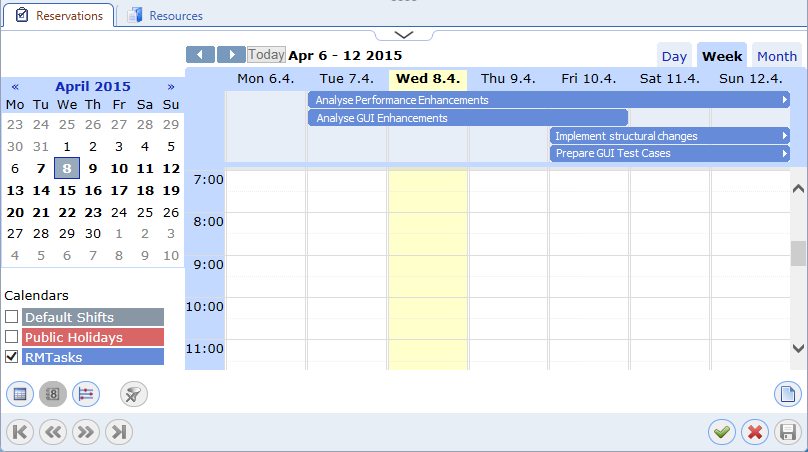
The reservations of the RM project can also be viewed in the standard catalog or calendar view. Use the switch buttons in the left-hand bottom corner of the 'Reservations' tab to switch between the catalog view modes. When in the calendar view, the 'RMTasks' check box must be selected to see the reservations.