|
|
|
|
|
Editing a Scheduled Action
There are two ways of editing an existing scheduled action:
- Editing in the wizard
It is possible to edit an already existing scheduled action using the 'Schedule Action Wizard'. To do so, right-click the action in the catalog and select 'Edit in Wizard'. Editing will be done in the creation wizard with the current action values preselected in each step.
- Editing in Valuemation editors
Another way is manual editing without the wizard. "Power user" editing this way provides some additional parameters not accessible via the wizard. The trade-off is increased complexity.
To edit a scheduled action without the wizard, right-click the action in the catalog and select 'Edit'.
Note that it is also possible to create a new scheduled action without the wizard, i.e. using the below described editor for manual editing. To do so, use context menu command 'Schedule Action' in the 'Scheduled Actions' catalog.
Manual editing/creation of scheduled actions:
Calling 'Edit' or 'Schedule Action' from the 'Scheduled Actions' catalog opens an editor which contains three tabs:
Trigger
Tab 'Trigger' specifies how the action will be triggered.
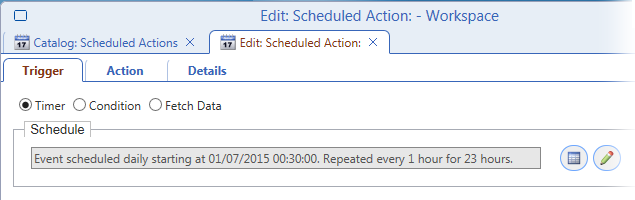
The following possibilities exist:
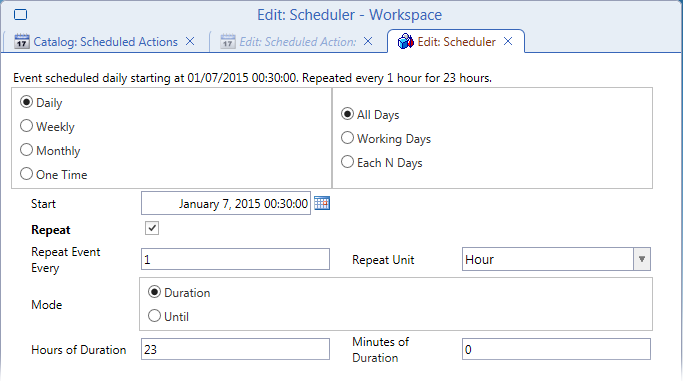
- Timer - time-based triggering. Click the edit button on the right to open the action scheduler.
- Condition - specify the condition which must be met for the action to be triggered. This corresponds to the catalog condition implicitly used in step 6 of the wizard.
Condition is a 'rule' type triggering event, the action is triggered at the moment when the condition changes from FALSE to TRUE.
The condition can either be manually entered in the 'Condition' field of the tab or it can be created using the 'Generate Condition' button.
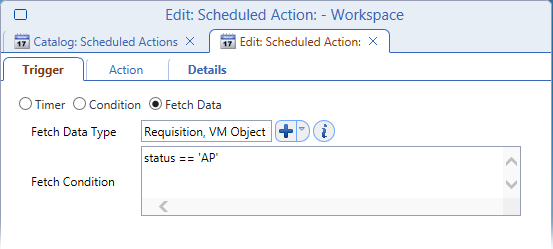
- Fetch Data - enables to run the scheduled action when a specific business object reaches a certain status. The substantial difference between 'Condition' and 'Fetch Data' triggering is that 'Condition' only triggers an action while 'Fetch Data' also retrieves the business object data and sends it to the process engine.
- Fetch Data Type: click the '+' button to select a Valuemation object type.
- Fetch Condition: specify a condition for objects of the selected object type. When one or more objects of the selected object type meet the condition, the data representing the object will be retrieved and the action specified on the 'Action' tab will be triggered.
Action
Tab 'Action' specifies the actual action to be performed. The content of the tab depends on selected action type.
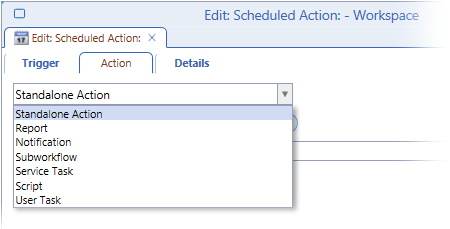
For example, if a request reaching a specific status (i.e. meeting a status condition specified on the 'Trigger' tab) were to be sent for rework, the following would be set on the 'Action' tab:
- Action type = 'Subworkflow'. In this case, fields 'Workflow Definition', 'Arguments' and 'Subject' become available.
- Workflow Definition = 'Requisition rework'
- Arguments = 'bo = data'
- Subject = not relevant

Details
Tab 'Details' provides additional relevant information.
- Name - name of the scheduled action under which it will be displayed in the 'Scheduled Actions' catalog.
- Description - optional description text
- Editable Process, Active Process - references to the underlying BPM process. In Valuemation rich client the BPM process can be opened from here.
- Owner - Valuemation user acting as the owner of the action. Assigning an owner to the action is the basis for making the action user-specific.
- Run only when user is logged on / Run whether user is logged on or not: If 'Run only when user is logged on' is selected, the scheduled action will be triggered only when the action owner is logged in.
- Password: When password is specified, the action will be password protected. The password is used by the task executor of the underlying BPM process and when the action is triggered, it asks for password authorization before it is executed.
Password protection could be used, for example, for scheduled actions producing reports with restricted access data.
Buttons 'Generate Condition' and 'Generate Filter'
Depending on options selected in the editor, two buttons are offered at the bottom of the editor:
- Generate Condition
This button is available when 'Condition' or 'Fetch Data' is selected in the 'Trigger' tab. It simplifies creation of the condition used in the 'Condition' or 'Fetch Condition' fields, respectively.
- Generate Filter
'Generate Filter' is available when 'Report' is selected in the 'Action' tab. It simplifies creation of the condition used in the 'Additional Filter'field.
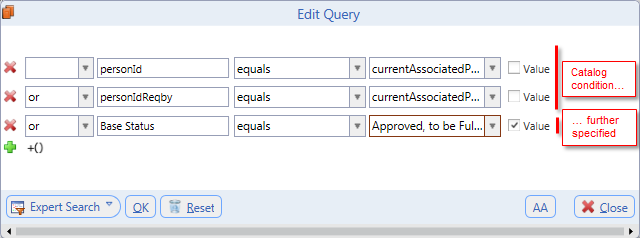
Generate Condition / Generate Filter in use:
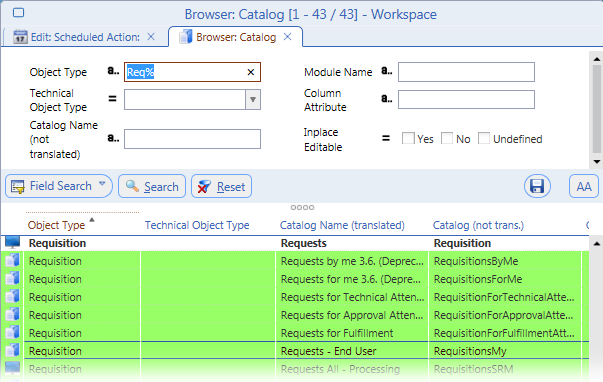
- Click the 'Generate Condition' or 'Generate Filter' button. A list of existing catalogs opens.
- Select a catalog from the list. The catalog condition of the selected catalog will be used as a starting point for creation of the new condition.
- After selecting the catalog, the query editor opens. Use it to further specify the condition.