|
|
|
|
|
Report design
Once the data set has been created, it is time to add individual content element to the report.
Adding elements
Text fields can be added by drag&dropping them from the 'Report Explorer'. Elements of other types are added from the left-hand toolbar. Note that the type of element placed in the report cannot be changed later.
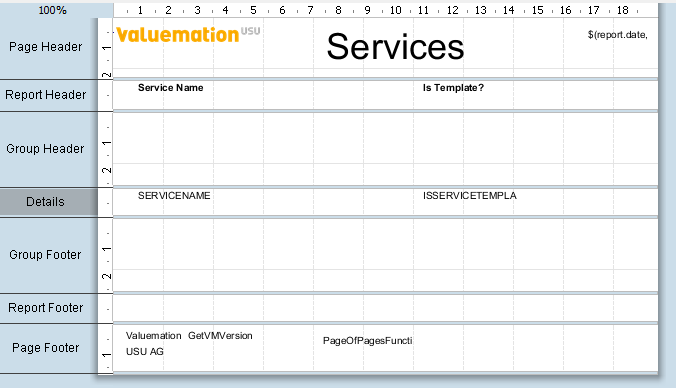
For example, creation of a report listing all Services together with their 'isTemplate' flags would involve the following:
- Add two 'label' elements (from the left-hand toolbar) to the Report Header and type 'Service Name' in the first label and 'isTemplate?' in the second one.
- Set appropriate format for the header elements, e.g. change their font attribute to 'bold'. You can select multiple elements by <Shift + mouse click>.
- Drag & drop attributes 'SERVICENAME' and 'ISSERVICETEMPLATE' from the 'Services' tree in the 'Report Explorer' to the 'Details' part of the report.
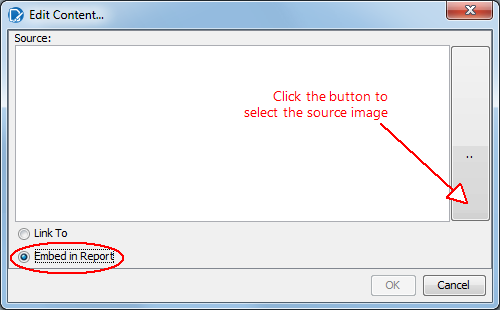
Adding a picture to the header
- Drag&drop an 'image' element (from the left-hand toolbar) to the page header area.
- Double-click the element. A dialog 'Edit Content...' opens.
- Click the button on the right of the 'Source' field in the dialog and select the source image.
Adding other elements to the header
- Drag&drop a 'label' element to the center of the page header area and type the report name ('Services' in our example). Set a larger font size.
- Drag&drop a 'message' element to the right-hand part of the page header area and set the content to "$(report.date, date, dd.MM.yyyy)" to display the date of printing in runtime.
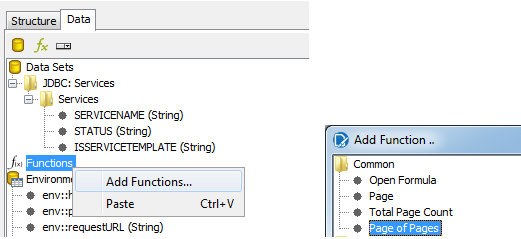
Create footer content
To display current page in the footer area, do the following:
- Go to the Report Explorer 'Data' tab, locate the 'Functions' item and call the 'Add Functions...' action.
- In the 'Add Function...' dialog, go to folder 'Common', select the 'Page of Pages' function and click 'Ok'. Then drag & drop the function in the page footer area.
- Drag and drop additional 'label' elements to the footer as appropriate.
The report design might look like this:
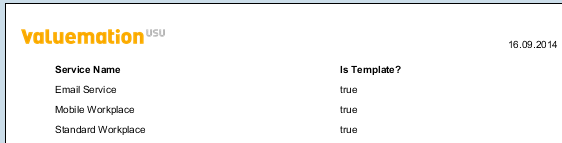
Clicking the "small blue eye" icon in the top left-hand corner displays a report preview.
- Having finalized the report design, save the report definition.
The resulting file with .prpt file extension will be needed to import the report to Valuemation.