|
|
|
|
|
Escalation Settings
General settings for Valuemation Escalation are specified in the Global Settings menu which is available when Valuemation is started in Administrator mode.
Start Valuemation is the admin mode, go to "Settings" and "Global Settings". There is a separate sub-menu for the Escalation Settings in the Global Settings:
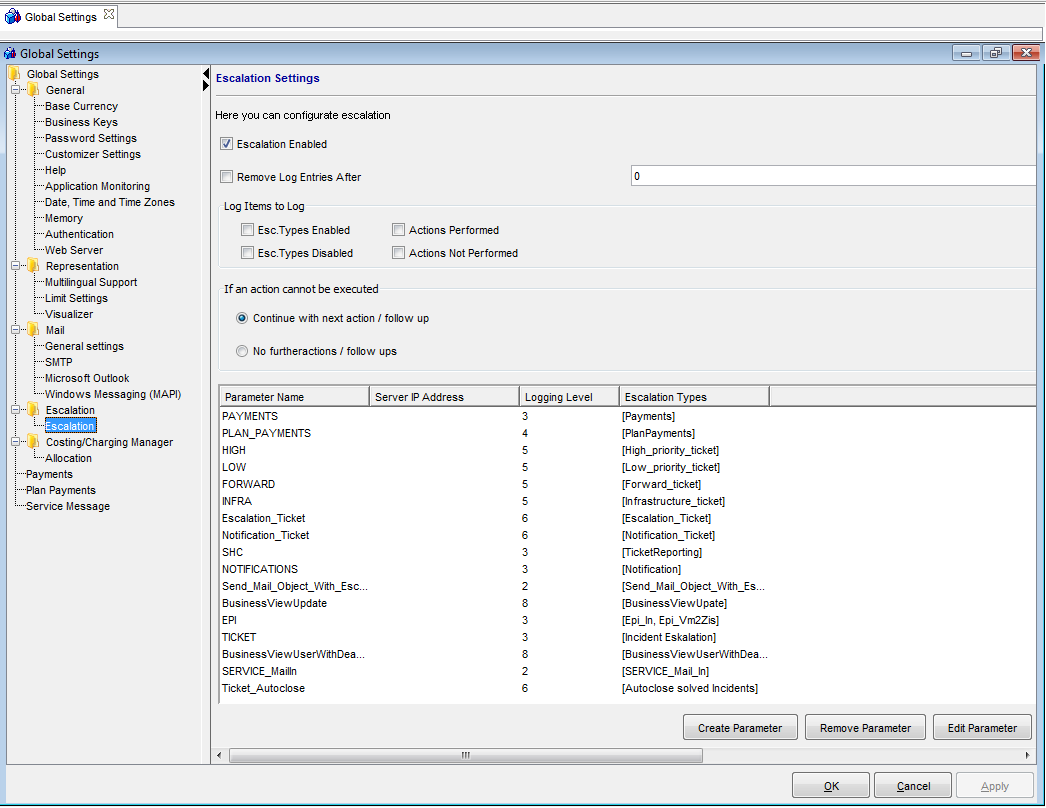
The Escalation Settings
Window Component |
Function / Meaning |
Escalation Enabled |
The first setting enables or disables the whole Escalation Process – regardless of any other settings which are made. If the Escalation is disabled here, then none of the other settings will be processed. |
Remove Log Entries After |
There are various different settings which relate to the logging of escalation activities. The Escalation writes to the general Valuemation Log (use the filter in the Log Viewer to view only the log entries for the Escalation). These settings refer specifically to logging: Select the checkbox "Remove Log Entries After" to automatically delete log entries after a specific amount of time has elapsed. Enter the number of days in the Days field. Log entries describing Escalation activities will be automatically removed after the specified number of days have elapsed. |
Log items to Log |
Using the checkboxes, the user can specify the amount of detail to be included in the log: "EscTypes enabled" writes to the log when an Escalation Type is enabled. "EscTypes disabled" writes to the log file escalation types which were not processed because it were disabled. "Actions performed" logs the actions which were successfully performed. "Actions not performed" logs the actions which could not be performed for some reason. As these are checkboxes any combination of options can be selected – including none or all. |
If an action cannot be executed |
This section allows the user to specify what should happen if an action cannot be executed. The options are: 1) Continue with next action/follow up - if an escalation action is not successfully performed then continue with the next action for the same escalation level (if one exists). 2) No further action/follow ups - if an escalation action is not successfully performed do not continue with the next action at the same escalation level. |
|
|
Finally there is a table of existing Escalation Parameters - the table lists the following information:
- Parameter Name (name of the Escalation Parameter)
- Logging Level (the logging level to be used for that Escalation Parameter)
- Escalation Type (the Escalation Type associated with that Escalation Parameter)
There are three controls for this table:
- Create Parameter (opens a window for creating a new Escalation Parameter)
- Remove Parameter (removes the Escalation Parameter highlighted in the list)
- Edit Parameter (opens a window for editing an existing Escalation Parameter. From here you can navigate through the different objects which make up the Escalation. Alternatively, the objects can be edited / viewed as normal objects in the Objects Treeview).