|
|
|
|
|
Example
In this example we are going to demonstrate how Template Workflows can be used. The result will be '1 Template Workflow' with '2 Actions' assigned to it. Even though there will only be 1 Template Workflow , it will act as 2 different workflows.
The first action we create is going to be the default action mapped to the original Template Workflow.
The second action will have edited Workflow Properties in the context of an action.
That means, that in 1 specific context of the action, the second action will be used instead of the first one. Although it will start the same workflow, it will behave differently.
Create a Workflow
Note: This example tutorial assumes you already know how to create workflows. If not, please make yourself familiar with Workflows .
1. Open the 'Workflows Definitions' catalog (found in Valuemation Core)
2. Right-Click anywhere in the catalog to open the context menu and select 'Create' to create a new Workflow.
3. Fill in your desired name for the Workflow (we'll use 'Template_Workflow' in our example).
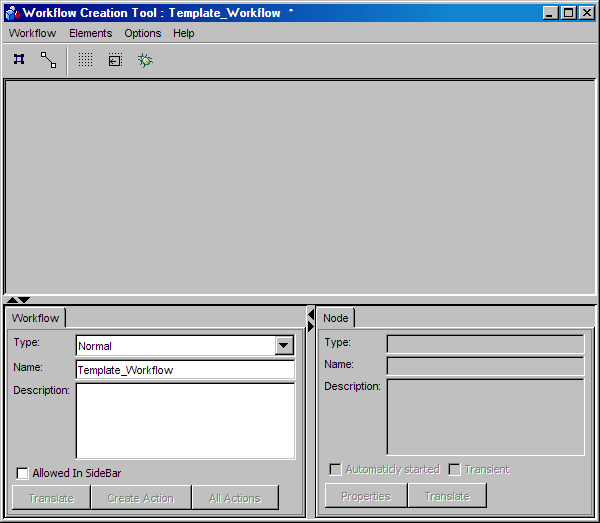
4. 'WCT' (Workflow Creation Tool) appears:
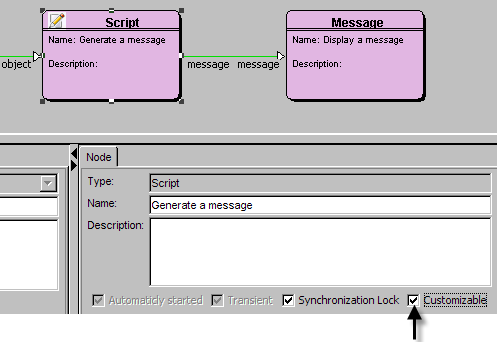
5. Create a "Start from Catalog" node, a "Script" node and a "Message" node . Name the "Script" and "Message" nodes (in our example "Generate a message" and "Display a message"). Clear the "Label" field in the "Message" node's properties.

6. Create a transition from the start node to the script node. Use the settings below:
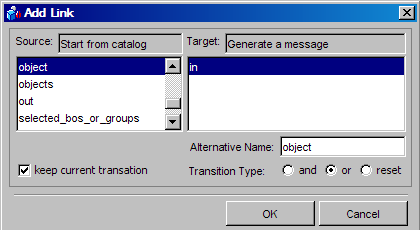
7. Create a transition from the script node to the message node. Use the settings below:

Your Workflow Definition should now look like this:

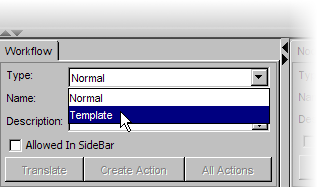
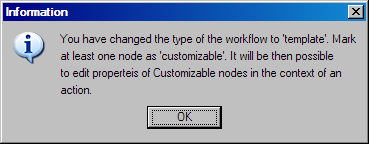
8. Change the 'Workflow Type' to "Template Workflow":
A message pops up:
9. Select the 'Script' node and set it to 'Customizable':
10. Edit the 'Script' node and paste this into the Script Editor for the node:
_output.put("message", "This is the default message generated from the original Template_Workflow by the default action.")
11. Save the script in the Script Editor and save the Workflow. You can now close the WTC.
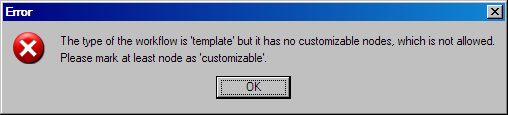
Note: If the Workflow Definition is set to "Template Workflow" (not "Normal") and no customizable nodes are set, than it's not possible to save the Workflow Definition. An error message like this will pop up:
Create a default Action for the Workflow
1. Find and open your Workflow in the Workflow Definition Catalog (in our example Template_Workflow).
Note: To find your Template Workflow the column 'Type' can be used to filter all Normal/Template workflow types.
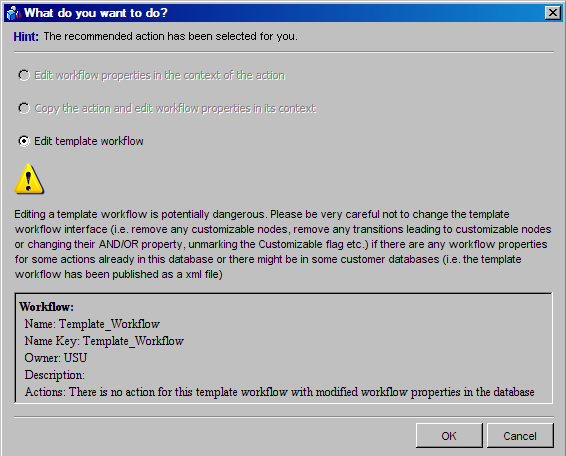
2. A dialog pops up. Choose the 'Edit Template workflow' and hit 'OK'.
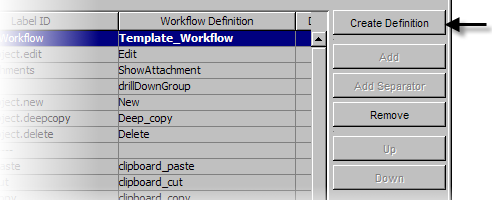
3. Click the "Create Action" button.
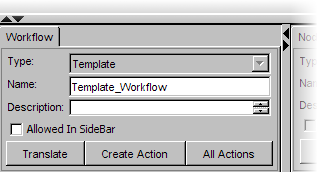
The Action Customizer opens.
Click the 'Apply' button followed by the 'Close' button.
Note: If you click the 'All Actions' button, the action you just created can now be found there (it's filtered automatically).
4. Open the 'Action Customizer' and assign the newly created action to the GUI. The workflow will be displayed in bold because it is a Template Workflow. Check the 'Button' check-box in order to see the action as a button in the catalog. Clear the 'GUI Rule' column in order to see the button even if nothing is selected in the catalog. (Place: Catalog, Valid for: default , Mode: Normal):
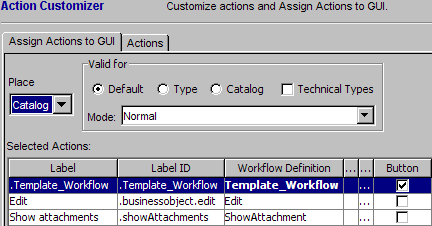
Note: If you are unsure or you do not know how to assign an action to the GUI, please see Assign Actions to GUI .
Save and close.
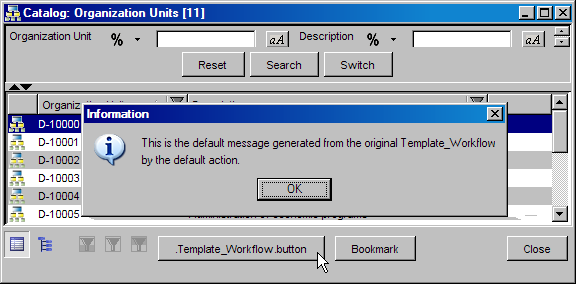
5. Test the action in a catalog without any specific actions assignment. (Organization Units in our Example)
Edit Workflow Properties for an Action
1. If there is no 'Action Set' defined for our catalog yet, we have to Create an Action Definition in the Action Customizer for the required Catalog (Facilities in our example).
Right-click anywhere in the catalog (in our example the Facilities catalog) and choose "Edit Action Assignment to Catalog". Click the 'Create Definition' button , apply the changes and close the Action Customizer.
2. In the Facilities catalog, right-click the Template Workflow button and select 'Edit Workflow':
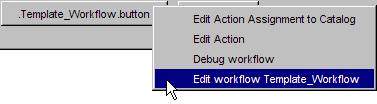
The Template Workflow Dialog opens.
3. Select 'Copy the Action and edit Workflow Properties in its context' and hit 'OK'.
4. Fill in the Description of the Action. (with "Facilities" in our Example)
5. Edit the 'Script' with:
_output.put("message", "This is a different message. It's generated from the Template_Workflow with edited Workflow Properties. These are stored in the newly created copy of the Action. It's still the same workflow.")
6. Save the 'Script' and save the 'Template_Workflow'.
Note: The Workflow is still the same, no changes have been made to the workflow. All the changes were made to the Workflow Properties just in the context of this Action and saved in the new Action.
7. Let's test the default Action and the new Action now:
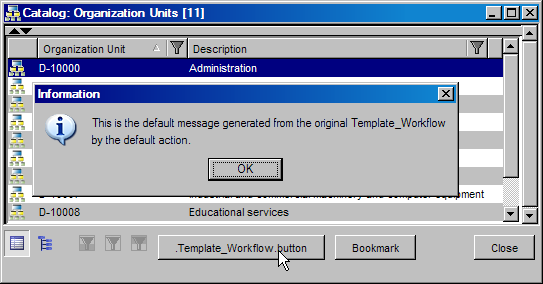
Catalog 'Organization Units' - default action
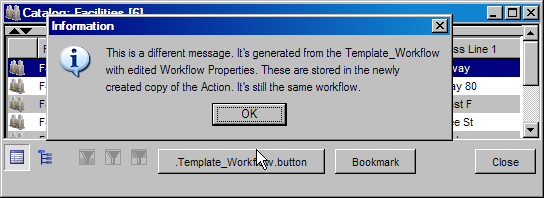
Catalog 'Facilities' - edited workflow properties - new action, same workflow