|
|
|
|
|
Example: Creating a MultiLine Mode
In this example, we are going to create a Multiline mode for the default Person catalog depicted in the 'Using the MultiLine Catalog' topic.
- Open Catalog Customizer for the 'Default: Persons' catalog and navigate to the MultiLine Designer tab.
- Our Multiline should contain the person's image on the left, this image should be insertable via object attachments. The person's name and id should be displayed at the top of the line, they should stand out from other information (bigger font, different font color and background).
Additionally, the following information must be displayed: Department, Employee Type and Status, Cost Center and Location, Contact information: Phone, Mobile Phone, Fax, Email. A comment field must also be included, this field should be capable of displaying multiple lines of text.
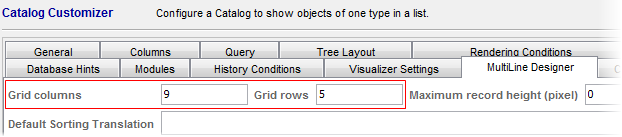
- Taking the above requirement into consideration, we have decided on a 9 by 5 cell grid. In the MulitiLine Designer, let's create the grid by specifying Grid columns=9, Grid rows=5.
- Now we have to insert cells linked to the required attributes. Let's start with the person's name and basic information.
In the MultiLine Designer, go to the Object Type Attributes pane and double-click the following attributes: First Name, Last Name, Title and Person Number. The corresponding cells get inserted in the grid.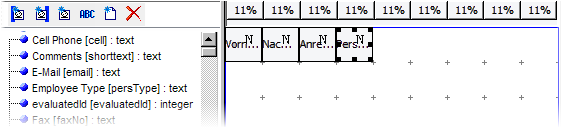
- The information we have just entered is self-explanatory enough that we do not have to provide any labels. Now let's position and format the cells. We also have to make sure that they display attribute values (as apposed to attribute names).
- Position the cells
Let's reserve the first two columns for the person's image and position the remaining cells to cover the rest of the first line. We will also separate Person Number by placing an empty cell before it. (For this, use the 'Add text cell' button and edit the 'Attribute Name' field so that it does not contain any text.) We might be getting something like this:

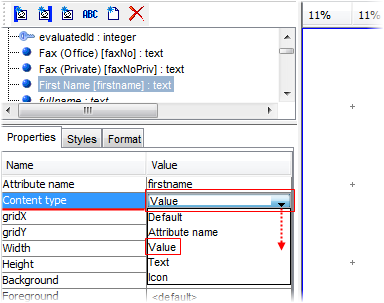
- Setting cell 'Content type'
For the cells to display the actual attribute values, they have to be of the 'Value' content type. In the 'Cell Properties' tab, set 'Content type' to 'Value' for all inserted cells except the empty one (its type should remain 'Text').
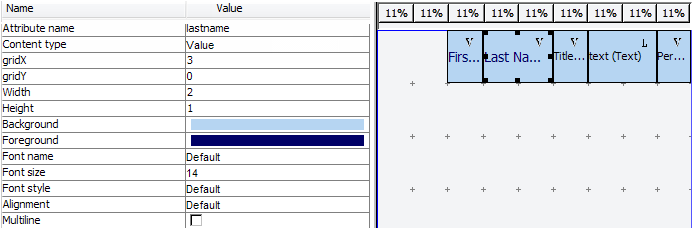
- Formatting the cells
Now it's time to make the cells look sexy. Use the 'Cell Properties' tab, see the 'Multiline Designer Tab' topic for a description of all available properties.
This is how our example layout was created:
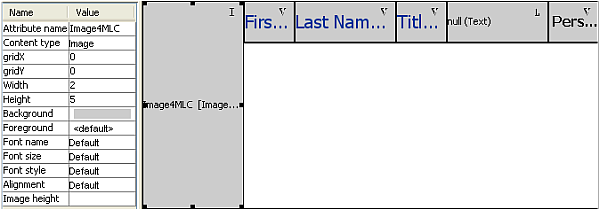
Let's insert an image cell. The cell displaying an image has to be of the 'Image' content type. Such cell has to be linked to an image attribute. See the 'Image from Attachment' topic for a description of creating a transient object type attribute capable of holding images from attachment. In this example we will assume that we have already created such attribute and named it 'Image4MLC'.
The process of inserting and formatting the cell is the same as described above.
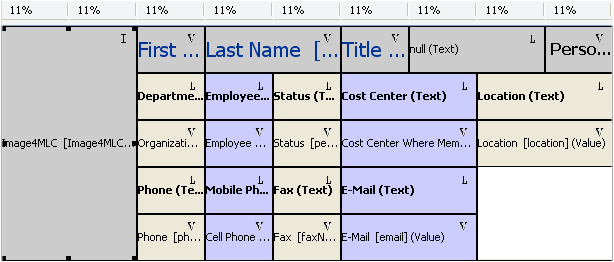
- Each of the remaining cells should be accompanied by a descriptive label. We can use the 'Add text cell' button or, alternatively, insert each attribute twice and give the two cells different 'Content type' properties (set one to 'text', the other to 'value').
Inserting the cell couples, resizing and formatting them as described above will result in a layout like this:
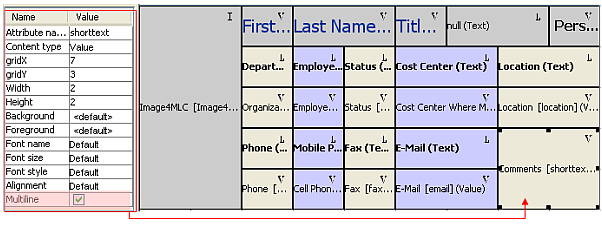
- The last cell contains a comment field which should be capable of displaying multiple lines of text (the content will be the value of the 'shorttext' object type attribute). To achieve this, we will set the 'Multiline' property to true.
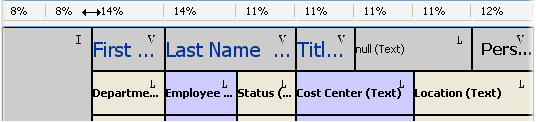
- As a final step, we may want to adjust the relative widths of the layout columns. See 'Arranging column widths precisely' in the 'Customizing the MultiLine Catalog' topic for hints on how to do this.
- At this point, we are done creating the MultiLine mode layout.
Save it by clicking 'Apply' in the Catalog Customizer and testing the result on Valuemation web client.
- Note that for the changes to apply you may have to restart the web server.
- If the objects in your database have no image attachments, you will have to create some to enjoy the full beauty of your design.
Whether your aim is to shock and awe or just to provide the user with a well laid out interface, Valuemation MultiLine Designer provides the tools to fit the bill.