|
|
|
|
|
Send Mail With Escalation
Configuration for sending emails using the escalation mechanism involves the following:
- Configure the Send Option
The Send Mail activity will store emails in the Mail Object table. The status of such Mail Objects is 'Created'. The activity will not send the email.
For all emails
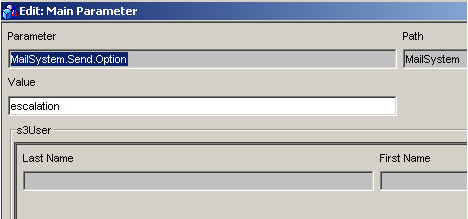
If you want to send all emails with an escalation workflow, then you can set the global main parameter 'MailSystem.Send.Option' to 'escalation'.
For specific emails
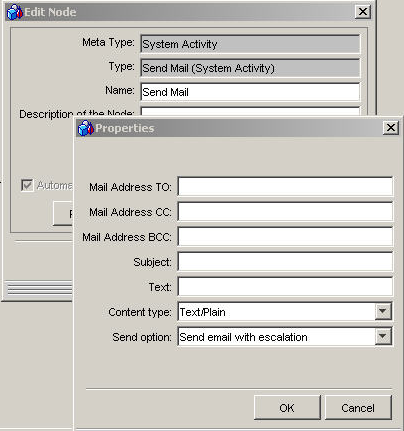
If you want to send only specific emails with an escalation workflow, then you have to adjust the workflow used for sending such emails. Select the value 'Send email with escalation' in the send option dropdown box of the 'Send Mail' activity or pass on the argument 'escalation' in an incoming transition.
- Provide the workflow for sending emails
Starting with Valuemation 4.1 the workflow is already available in your Valuemation installation. So, there is no need to install anything in this case. If you are using older versions than you have to import the xml file mentioned below.
Import the xml: 'Send_mail_object_with_escalation.xml'
The workflow sends emails for stored mail objects and sets the mail object status to 'Sent'.
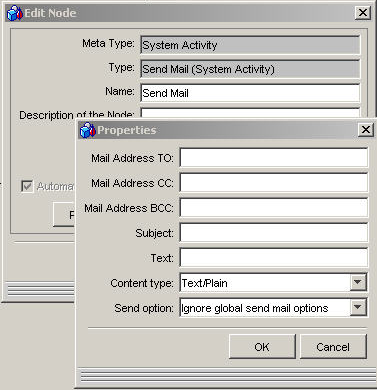
Hint: The 'Send option' parameter in the 'Send Mail' activity of the workflow has to be set to 'Ignore global send mail options', if you use the escalation mechanism for sending all your emails and therefore defined the global main parameter. Otherwise it would proceed as defined in the global settings and store another mail object without sending an email.
- Create the escalation objects
Starting with Valuemation 4.1 the escalation objects are already available in your Valuemation installation. So, there is no need to install anything in this case. If you are using older versions than you have to follow the instructions below.
You can use the install script 'escalation_data_setup.sql' to create the following objects:
- Escalation Type
Defined for the object type 'MailObject'
- Escalation Type Level
- Escalation Parameter
'Send_Mail_Object_With_Escalation' has to be called by the agent.
- Escalation Condition
Defined to select mail objects without a status or in the status ‘Created’
- Escalation Action
Starts the workflow 'Send_Mail_Object_With_Escalation'.
Attention: You might have to adjust the ID values in the provided insert script in case they are already used. Also pay attention to the client attribute value as the SQL inserts data for the client '01'.
- Escalation Type
- Setup the Escalation Server and Escalation Agent
To send the email you finally have to setup an Escalation Server and an Escalation Agent which is periodically started by a scheduler.
The name of the created Escalation Parameter has to be set for the ESCPARAMTER variable in the Escalation Agent batch file:
set ESCPARAMETER=Send_Mail_Object_With_Escalation