|
|
|
|
|
Defining the Node Tree Structure
Precondition: An object type has been selected in the Customization Browser and a new Visualization Profile creation process has been started.
To build a node tree structure:
- In the Node Definition Section, enter a name of the Visualization Profile.
- Use 'Add Node' to start building the node tree structure.
As you click the 'Add Node' button, the 'Select Attribute' dialog box appears.
- Select a relation attribute to form a new node.
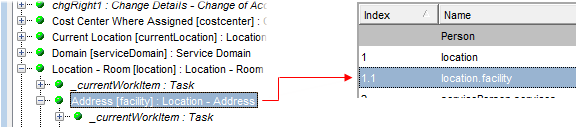
For example, let's add the Person' s 'Location'.
Now the 'Location' has been added to the node first level.
- Add another relation attribute.
For example, let's add the 'Address' of the 'Location'.
Now the 'Address' has been added to the second level of the node tree as the child node of the 'Location' parent.
- If you want to add the third relation level, repeat the main points of adding a node and expand the tree to the third level.
- Pick the desired attribute and the relation's relation is added to the third level of the node tree.

- Proceed in the same manner to add any number of attributes of various levels to build the desired node tree structure.
As a next step, you need to define details for the nodes (a title, style and node attributes).