Create a New REPORT Scheduler Job
To create a new Scheduler job of type REPORT, please follow these steps:
Open Scheduler application.
Click the Create job button and choose REPORT. The Scheduler – Create new job dialog opens.
Fill in the Job name. The job name is unique per user.
If your new job depends on the result of another job, you define this dependency in Depends on.
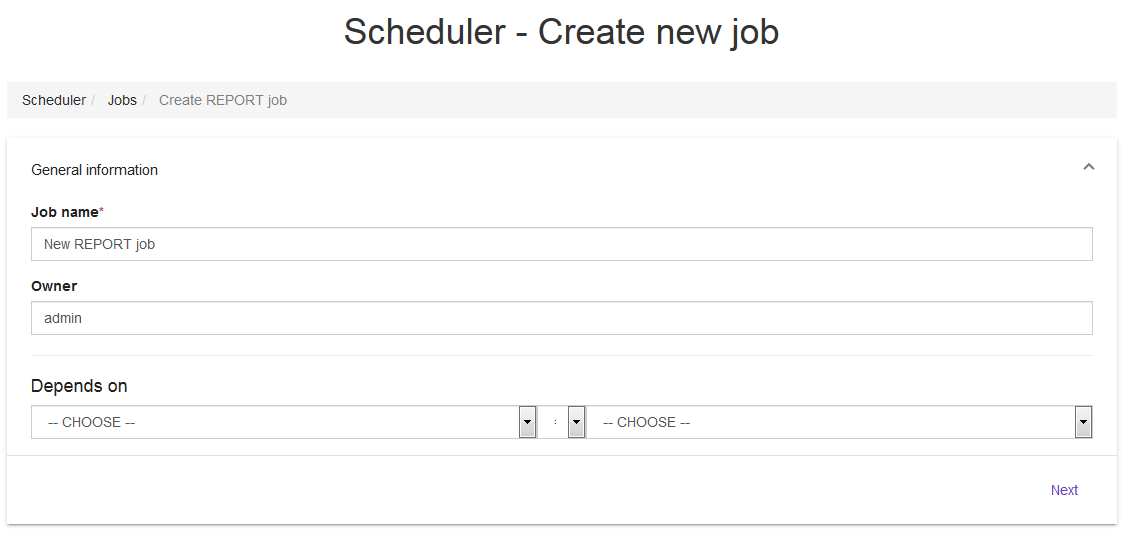
Click Next to get to the Actions section.
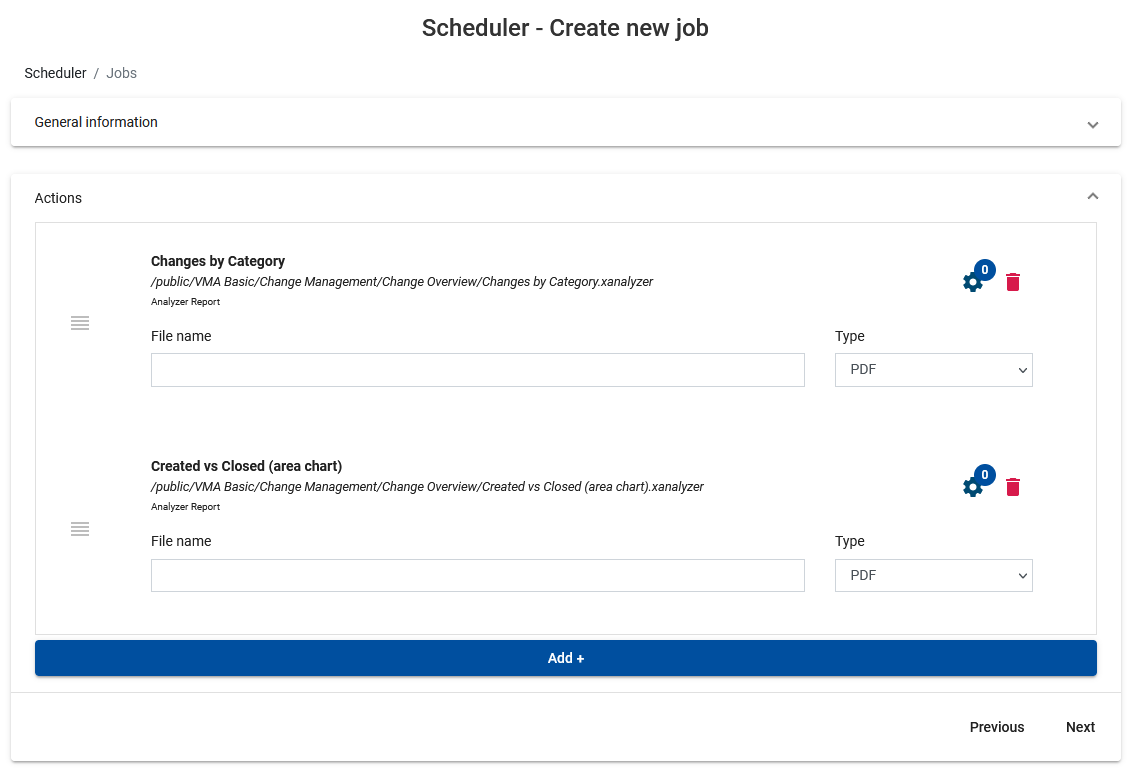
Add actions you want to run in this Scheduler job. Click the Add + button, select one or more of the offered reports. You can sort the selected reports by dragging them around or delete a report by clicking on the waste basket icon. Define the name and output format per report.
Click Next to get to the Output options section.
In the Output options section, you define the output location and the output folder. When checking Add timestamp, a timestamp information will be added to the file names of all rendered report files.
Click Next to get to the Trigger section.
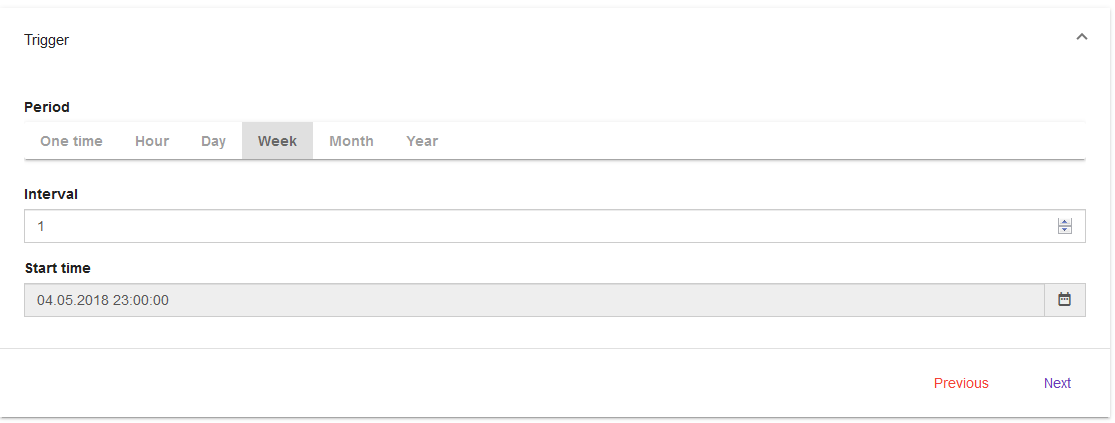
In the Trigger section you define the period, interval and start time of you schedule.
Click Next to get to the Notification settings section.
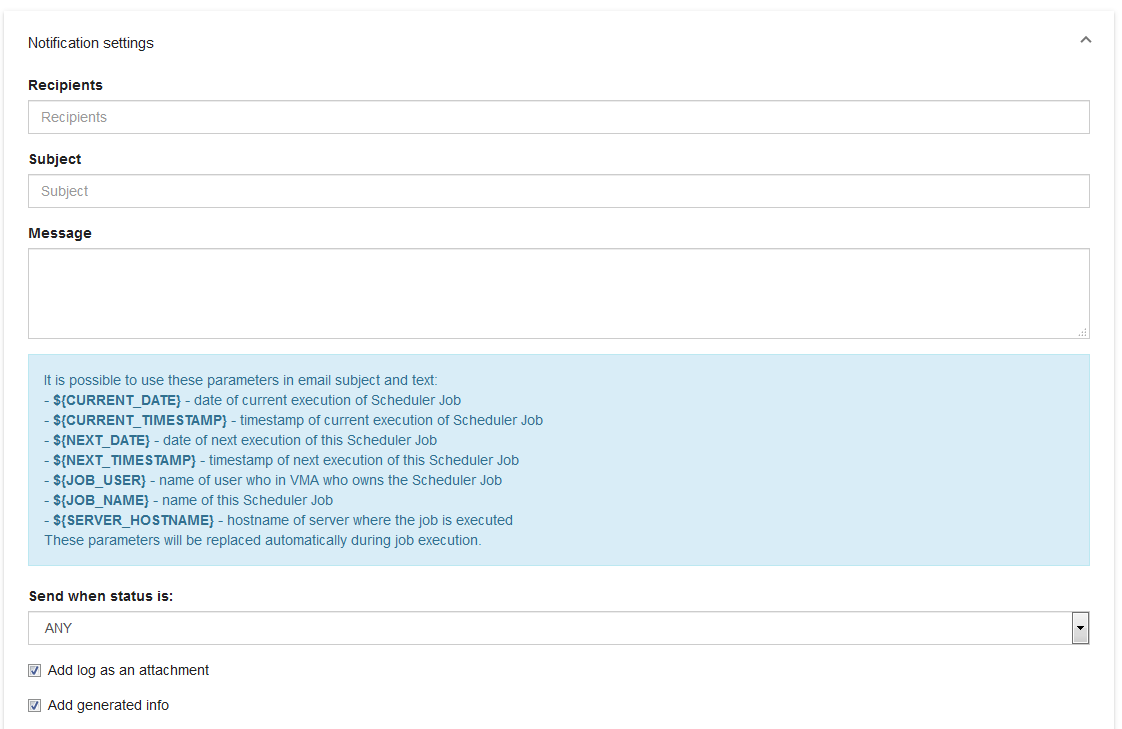
Information in Notification settings section is optional. When a Scheduler job is finished you can define if an automatic message is sent.
Fill in a comma separated list of email addresses as recipients, a subject and a message text.
With Send when status is you can define when a message is sent, e.g. only in case of a failure.
With Add log as an attachment and Add generated info you can add log information to you email.
With the Previous button, you can always go back to other sections.
Save your new Scheduler job.