How to use parameters
To use parameters in Report Assembler, please follow these steps:
Create a filter in the Analyzer Report you want to have parametrized in Report Assembler.
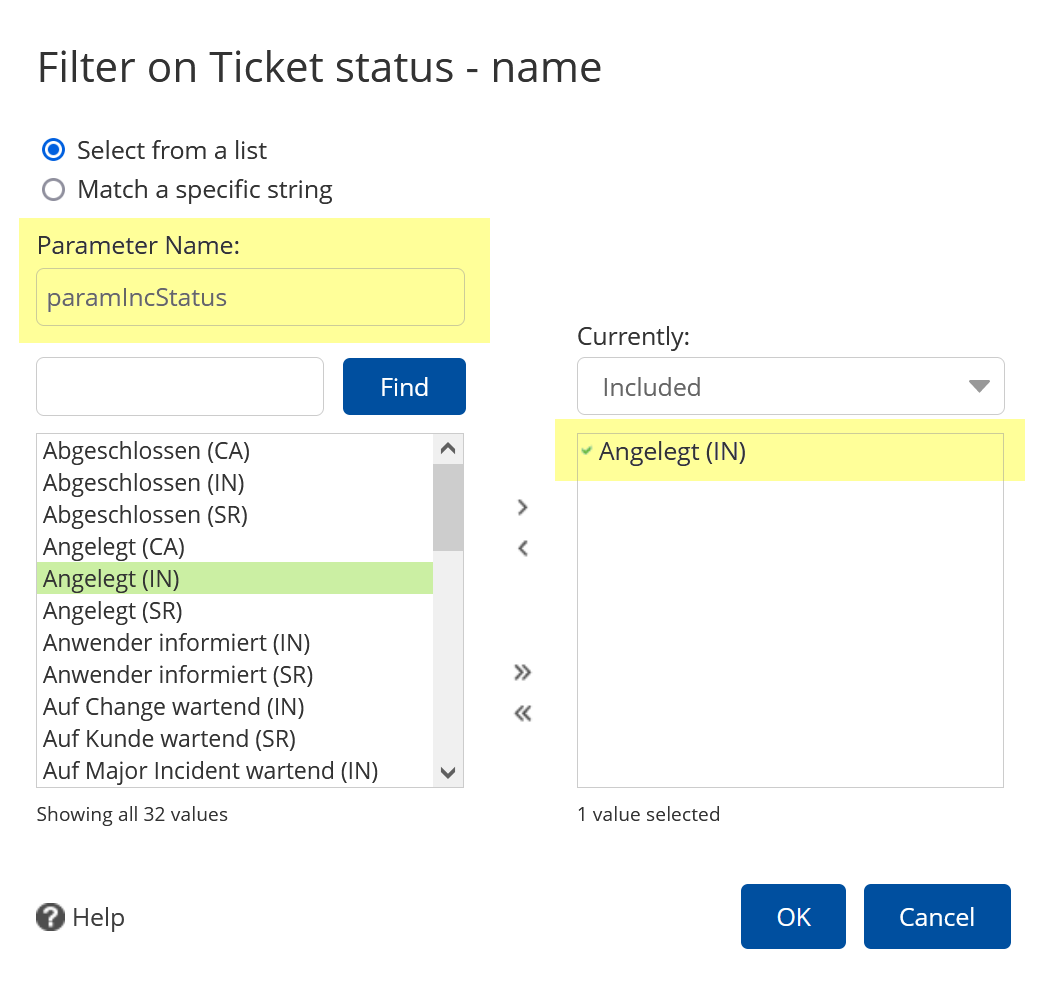
In this example we created a filter for the dimension Incident status – name. The value we selected in filter is Created (IN). The Name of the parameter we set to paramIncStatus.
Now we open or create a Report Assembler definition and add the Analyzer Report with the filter we created before to the definition.
Select the tile with the new Analyzer Report. Open the edit dialog and add the parameter to the description, e.g. like this:
This is the parameter we defined in the Analyzer Report: ${paramIncStatus}
Click Save.
Notice
Note that in browser view the parameters are not replaced and the chart shows the values using the value we selected in the filter in Analyzer Report.
Save the Report Assembler definition.
Open the Scheduler application.
Create a new Scheduler job of type Report.
In Actions
 select the Report Assembler definition we created in the steps before.
Add the parameter to the Action
.Notice
To define the parameter value you must use the business key / ID of the value you want to filter by. You can get this value if you open the Analyzer Report, open the filter and move the mouse over the filtered value. In this case the value is IN_CLD.
Save the job and test it.
After the report was rendered you can see that the parameter was replaced in the text and the data was filtered according the parameter value.